long-reads-workshop
A cloud server has been provisioned for this workshop. It is a fairly powerful virtual machine (32 CPU cores, 64Gb RAM; 2Tb disk) but since it is needed for a few different teaching activities it will only be available to use during this workshop.
Each of you has a separate user account on this machine where you can add data, run commands and take notes. At the end of the workshop I will provide instructions on how to download this data for backup and use on other computers.
Logging in
There are two ways to connect to this machine and we will use both of them.
Activity: Log in using the RStudio web interface.
Using a standards compliant web browser (Chrome, Firefox, Safari) navigate to rstudio.bioinformatics.guide. This should bring up a page asking for your username and password. You should have received these details in an email prior to the workshop.
After logging in you should see a full RStudio web interface which looks a bit like this;
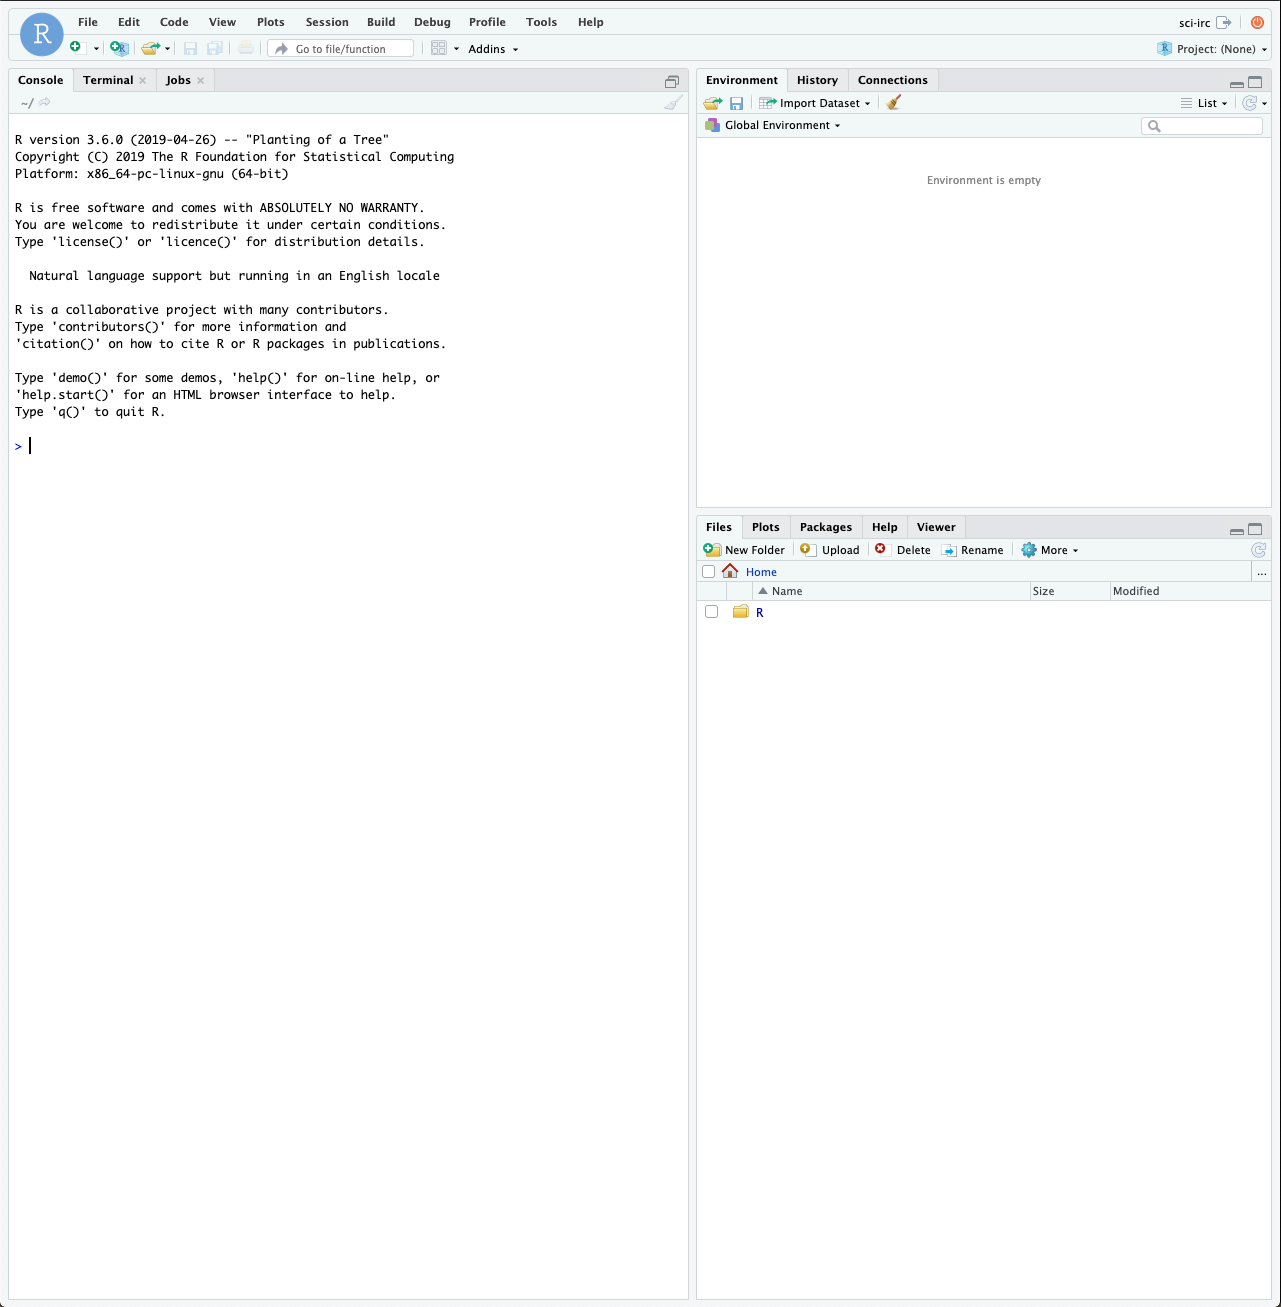
The RStudio Web Interface
Rstudio is a full featured environment for all things R. This now encompasses a very wide range of activities from interactive data analysis (R;RMarkdown) to writing R packages and even creating interactive web pages with R (Shiny).
In this workshop we will work with a web based version of RStudio. It is almost identical to the RStudio that you can download and run locally on your own laptop or desktop machine (compatible with most operating systems). For the workshop we use it simply to avoid hassles of setting things up on many people’s computers.
Another very useful feature of RStudio is its ability to interact with the underlying host operating system via the Terminal.
Activity: Open a Terminal Window
Click the Terminal tab in RStudio to open a command-line window. This window is where you can type unix commands. The window below shows an example. Try typing the ls command and pressing enter.
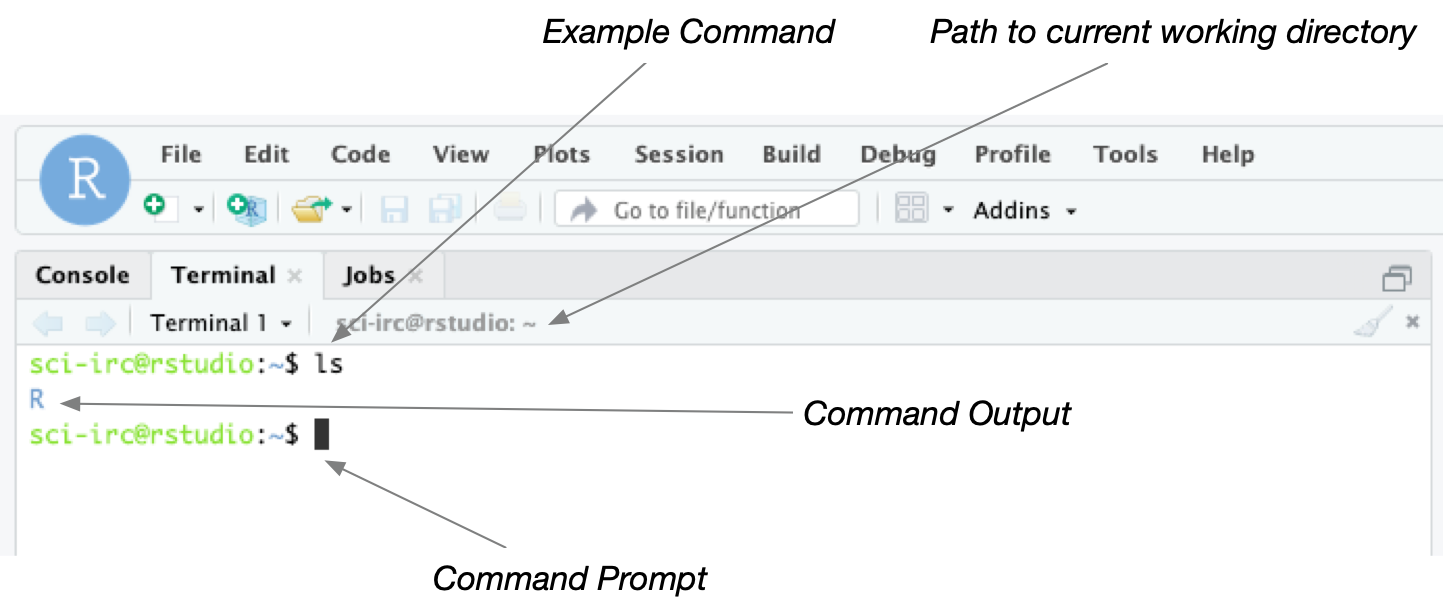
It is important to note the distinction between the Console window and the Terminal window. Both windows allow you to type commands but Console expects commands in R whereas Terminal expects unix commands.
Later in the workshop we will make use of the R features of Rstudio but for now we will just use it as a way to access the server and run unix commands.
Accessing the server with SSH
As an alternative to using RStudio to access the server you can also access it from the a Terminal on your local machine (ie your laptop) using a program called ssh (Secure Shell)
Activity: Log in using ssh
Open a Terminal window on your local machine. By local we mean the physical computer that you are typing on. The machine you connect to (the cloud server) will be called a remote machine because although you can interact with it, it is physically located somewhere else.
To connect to the server type a command like this
ssh [username]@rstudio.bioinformatics.guide
Where [username] should be replaced by your username. Hit enter to run the command and it should prompt you for your password.
For the purposes of this workshop we will mostly work directly via RStudio but it is important to know how to connect using ssh because many high performance computers (eg JCU HPC) don’t have RStudio installed and you must connect with ssh.
Projects and Files
A great way to organise your work when using RStudio is to create a Project. This is essentially just a folder with a special .proj file in it. When you open the .proj file RStudio will set things up so that you can easil work with files inside the project folder.
Activity: Create an RStudio project
Create a new RStudio project. This project will contain all the scripts to create for working with Nanopore data in this workshop. Name your project accordingly. I have named mine nanopore_workshop
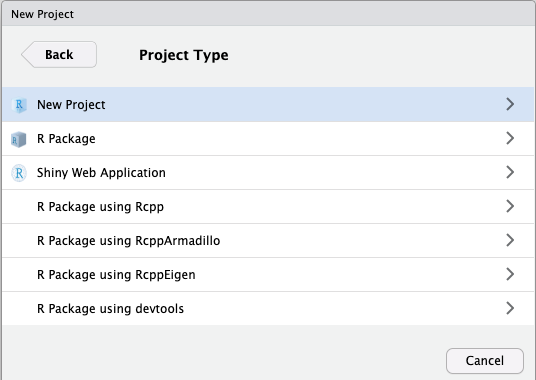
To create the project use the project menu at the top right of the RStudio interface
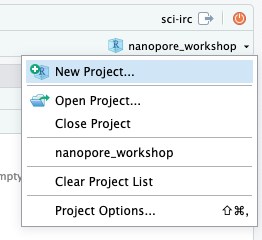
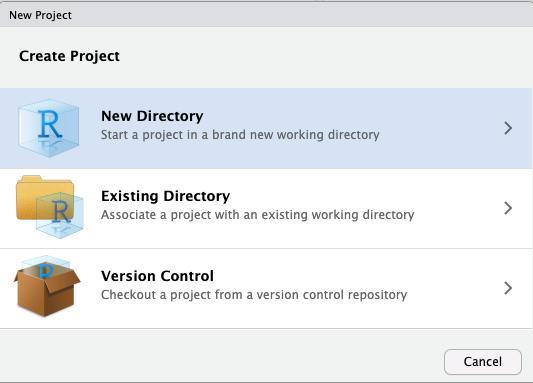
Then select new directory as the project type, and then New Project again in the menu that appears
Activity: Explore the location of project files and folders
After creating the new project RStudio will automatically open it. In doing so it will change your current working directory to the nanopore_workshop directory.
Open the Terminal window in RStudio and use the unix commands ls, pwd, and cd to explore files and folders on your system.
Activity: Create another new project and try switching between them
The project menu at the top right of RStudio allow you to easily switch between projects. Creating multiple projects will give you a feeling for what exactly a project is (ie just a folder with a .proj file) and what it means to switch between or open a project.
RMarkdown
When starting out in bioinformatics many people take notes in document editing programs familiar to them such as Microsoft Word. While this can sometimes work it is much better to take notes using a plain text format. Programs like Word are terrible for writing computer code because they will do unexpected things like capitalize words or convert characters (eg convert a double dash -- into a longer single hyphen).
Markdown is a simple plain text format that is great for taking notes and writing larger documents that include computer code. RMarkdown is a variant of Markdown that is understood by RStudio and allows you to include code chunks that can be run to create images or perform analyses.
Activity: Create an RMarkdown file for taking notes.
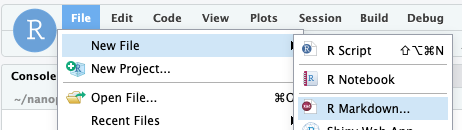
Create a new file using the File menu in RStudio. Note that the first time you do this RStudio will prompt you to install a bunch of packages. Just click OK to install them.
Call it Command Line Basics and select output format as html. After RStudio has created your document you should save it. Name the file 01_basics.Rmd.
Naming conventions are a very important organisational tool. I like to name all my files using a numeric prefix within projects. This provides a sequential order to things that I find is often helpful when tracking down what I have done.
Activity: Note down some commands
So far today we have used the ssh, ls, cd, pwd commands. Make some notes about these in your newly create RMarkdown document.
First delete the placeholder text that comes with the template document. This means everything below the heading ## RMarkdown but not the code chunk and title field above it.
For full details on how to author RMarkdown documents refer to the cheat sheet.
When you have made some edits click the Knit button to see what your document looks like as an html page
Moving files to/from the remote server
At some point you are likely to want to either copy your files from the rstudio server down to your laptop or vice versa. This can be done in two ways;
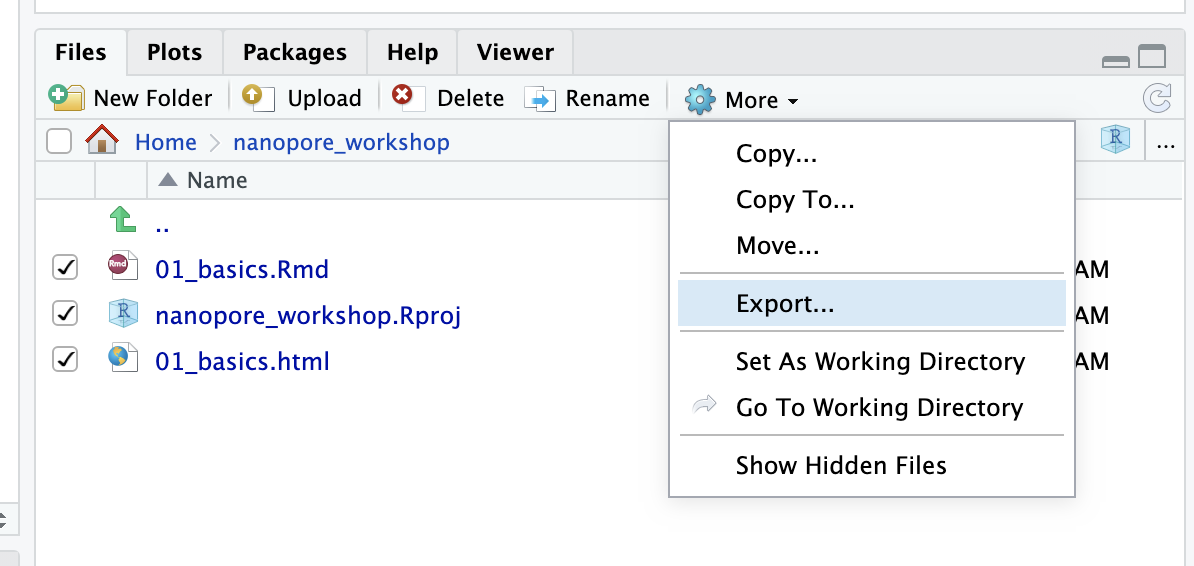
1. Using the RStudio web interface
You can export selected files which will zip them up and download them to your computer
In the other direction you can use the Upload button to upload files from your laptop
2. Using the scp command from Terminal
Open a terminal on your laptop. To copy a folder from the remote machine to your local machine you would do;
scp -r [username]@rstudio.bioinformatics.guide:~/nanopore_workshop .
And to upload you would do
scp -r local_directory [username]@rstudio.bioinformatics.guide:~/
The -r flag is needed to transfer directories. Note that you will need to edit the paths in these examples to whatever is relevant to your task.
Installing Software With Conda/Bioconda
The conda package manager is a very easy and convenient way to install and manage collections of bioinformatics software.
We will install a minimalist version of conda called miniconda. This is my preferred method of installing most bioinformatics software.
All of the commands below should be run from the Terminal window on the rstudio cloud instance.
1. Download the miniconda installer
wget https://repo.continuum.io/miniconda/Miniconda3-latest-Linux-x86_64.sh
2. Run the installer
bash Miniconda3-latest-Linux-x86_64.sh
You will need to accept the license conditions. Type yes to all other prompts. This will setup conda on your user account.
3. Test your installation
Close your Terminal window and then open a fresh terminal window. After you do this the conda tool should now be available to you. Check that it is by typing the following command
conda info
If everything is working you can now cleanup the installer script
rm Miniconda3-latest-Linux-x86_64.sh
4. Setup Channels
To install bioinformatics software from the bioconda project (most bioinformatics software) we need to setup channels as follows.
conda config --add channels defaults
conda config --add channels conda-forge
conda config --add channels bioconda
5. Install software
A huge range of bioinformatics software is available from the bioconda channel and now that you have set this up you can install it with a single easy command like this
conda install name_of_package
Later we will use a program called bioawk. Go ahead and install it now like this
conda install bioawk